Sign up now to join the JEGS email newsletter and be the first to learn about new products, special deals and e-mail only offers!
Installing a new transmission is a significant undertaking that requires careful planning, research, and the right tools. While it may seem like a daunting task, with proper guidance and preparation, it's a feasible project that can be accomplished in your garage. This comprehensive guide will walk you through the process of installing a new transmission, helping you achieve a successful replacement without sacrificing quality.
Pros & Cons of Installing Yourself
Before diving into the installation process, it's essential to consider the advantages and disadvantages of tackling the job yourself:
Pros:
- Cost savings: DIY installation can save you money on labor costs.
- Learning experience: Gain valuable knowledge about your vehicle's transmission.
- Convenience: Work on your schedule and pace.
- Satisfaction: Accomplishing a significant automotive task on your own can be rewarding.
Cons:
- Complexity: Transmission installation can be challenging and time-consuming.
- Specialized tools: You'll need specific tools and equipment.
- Potential errors: Mistakes during installation can lead to issues down the road.
- Limited warranty: DIY installations may not come with the same warranty as professional installations.
Cost of Installing a New Transmission
The cost of installing a new transmission can vary widely depending on several factors, including your vehicle's make, model, and whether you choose professional installation or DIY. Professional installation costs typically include labor and may vary based on the complexity of the job. DIY installations can save on labor costs but require an investment in tools and equipment.
Getting Started & Planning
- Research: Conduct extensive research on your vehicle's make, model, and engine type. Identify compatible components and purchase them as a kit for convenience.
- Quality Parts: Seek reputable retailers offering renowned brands with warranties and after-sales support.
- Comprehensive Upgrades: Check if other components like driveshafts, differentials, or clutches need replacement or upgrading. Consider performing these tasks simultaneously for convenience.
How Long Will Installing A Transmission Take?
The duration of a transmission installation can vary widely based on factors such as your vehicle type, your level of expertise, having all necessary tools, and purchasing the correct transmission kit. While it's challenging to provide an exact timeframe, here's a general guideline:
- Expect a minimum of four hours if you work efficiently.
- Complex vehicles may require three days or more for the job.
Ensure Safety First
Prioritize safety during the entire process. Read and understand all warning labels and literature that come with the new transmission kit. Following the instructions correctly is crucial to avoid post-installation issues. Consider seeking expert advice or assistance, especially if it's your first time performing such a significant task. Having an extra pair of hands can make the installation smoother and safer.
What You’ll Need
To ensure a successful transmission installation, assemble a comprehensive set of tools and equipment, including:
- A full set of sockets and wrenches, including a torque wrench.
- Screwdrivers of various types and sizes.
- A means to lift your car high enough for old transmission removal and new transmission installation (e.g., shop lift, high lift jacks, and jack stands).
- A transmission jack for safe removal and installation.
- A hoist or block-and-tackle for lowering and raising transmissions.
- Wheel chocks for vehicle stability.
- A mallet, brake cleaner, funnel, and container for draining transmission fluid.
- New transmission fluid.
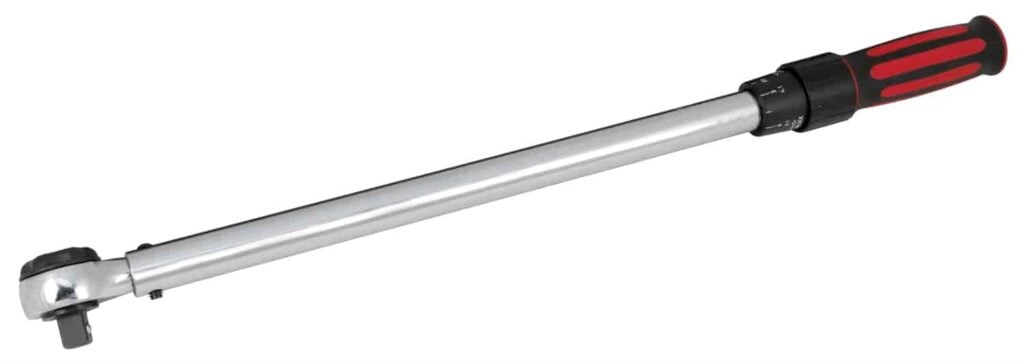
The specific tools required may vary based on your vehicle's make and model, so consult with an expert for precise requirements.
Process For Installing A New Transmission
While the exact process may vary depending on your vehicle, here's a general guideline:
- Secure the Vehicle: Place wheel chocks to prevent movement.
- Transmission Support: Properly support the transmission.
- Disconnect Components: Disconnect accessible components connected to the transmission from the top.
- Lift the Vehicle: Use a lift or jacks to raise the vehicle safely, then use jack stands for added security.
- Fluid Drainage: Drain the transmission fluid carefully.
- Component Removal: Disconnect and remove components from below the vehicle.
- Transmission Removal: Lower the old transmission onto a wheeled jack and remove it.
- New Transmission Positioning: Position the new transmission on a wheeled jack beneath the vehicle.
- Installation: Slowly raise the new transmission, bolt it into place, and reconnect all components.
- Bolt Check: Double-check all bolts for tightness following proper torque specifications.
- Vehicle Lowering: Lower the vehicle, remove wheel chocks, and reconnect everything from the hood access side.
- Final Inspection: Perform a final check to ensure nothing has been missed before taking a gentle test drive.
By following this step-by-step guide and prioritizing safety, you can successfully install a new transmission in your vehicle. Remember to perform extensive research, acquire high-quality components from reputable retailers, and use the correct tools for a smooth and efficient installation process. If you need any assistance or quality transmission products, you can rely on JEGS for their extensive inventory and excellent after-sales support. Happy driving!